


In our increasingly interconnected world, the ability to reach a global audience is a key consideration for any website developer. Whether you're running a personal blog, an e-commerce platform, or a corporate site, catering to a diverse range of users who speak different languages can significantly enhance your online presence and user engagement.
So let us start creating our Next.js Multi-language website with RTL support using the i18Next.
Create a Next.js app
npx create-next-app i18n-demo
Install the next-i18next packages
We are using the package next-i18next to translate our Next.js app. The package will handle the locales and changes the language strings on our pages.
The below command will install this package in our app.
npm i next-i18next react-i18next i18next
Wrap the entire Next JS app with the appWithTranslation
We need to wrap the entire app with this higher-order component. Open the _app.js file inside the pages directory and wrap it with appWithTranslation as below.
_app.js
import '@/styles/globals.css'
import type { AppProps } from 'next/app'
import { appWithTranslation } from 'next-i18next'

function App({ Component, pageProps }: AppProps) {
  return <Component {...pageProps} />
}

export default appWithTranslation(App)
Crafting the Configuration for next-i18next
Now make a next-i18next configuration file. The configuration below should be included to the file next-i18next.config.js that you create in the project root.
next-i18next.config.js
const path = require("path");

module.exports = {
  i18n: {
    locales: ["en", "he"],
    defaultLocale: "en",
    localeDetection: false,
    localePath: path.resolve("./public/locales"),
  },
};
Now import the i18next configuration we created into the main next.config.js file for our project.
next.config.js
/** @type {import('next').NextConfig} */

const { i18n } = require("./next-i18next.config");

const nextConfig = {
  reactStrictMode: true,
  swcMinify: true,
  i18n,
};

module.exports = nextConfig;
Add the locales
Let's now begin adding locales to our app. Hebrew and English language strings are being added at this point.
To hold the various language strings, we will create the files /public/locales/en/common.json, and /public/locales/he/common.json.
The file organization will be exactly as shown below.
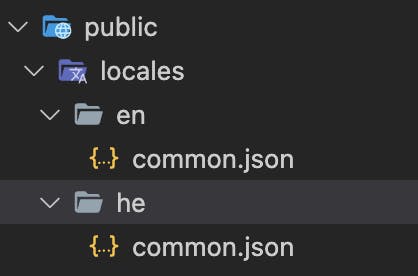
Our /public/locale/en/common.json file will contain the locale strings to be shown when selecting the English language. This is given below.
{
    "home": {
      "title": "Hello World"
    }
}
The /public/locale/he/common.json file will contain the locale strings to be shown when selecting the Hebrew language. Refer to the below code.
{
    "home": {
      "title": "שלום עולם"
    }
}
Translate Your Page Contents
First import the useTranslation hook from the next-i18next package.
import { useTranslation } from "next-i18next";
The language strings that we put to the locale file inside the locales directory can now be retrieved using the function t().
const { t } = useTranslation();

  return (
    <>
        <h1>{t("home.title")}</h1>
    </>
  );
We also need to import serverSideTranslations from the next-i18next/serverSideTranslations.
In our app, we are using the getStaticProps. Refer to the below code.
export async function getStaticProps(context: any) {
  const { locale } = context
  return {
    props: {
      ...(await serverSideTranslations(locale)),
    },
  }
}
The following is the code for the complete home page.
import { serverSideTranslations } from "next-i18next/serverSideTranslations";
import { useTranslation } from 'next-i18next'
import LangSwitcher from "@/components/LangSwitcher";

export default function Home() {

  const { t, i18n } = useTranslation();

  if (typeof window !== "undefined") {
    document.body.dir = i18n.dir();
  }

  return (
    <>
      <div className='h-screen flex px-5 flex-col gap-5'>
        <h1 className='text-7xl font-bold mt-5'>{t("home.title")}</h1>

        <LangSwitcher />
      </div>
    </>
  )
}

export async function getStaticProps(context: any) {
  const { locale } = context
  return {
    props: {
      ...(await serverSideTranslations(locale)),
    },
  }
}
Building Language Switcher Component
The LangSwitcher component relies on React and Next.js, utilizing the useRouter hook to access the router object. It offers users the choice between English and Hebrew, allowing them to effortlessly toggle between languages with just a click. When a language is selected, the component leverages the router to update the locale without refreshing the page, ensuring a smooth transition between language versions of your site.
The following is the code for the complete language switcher component.
import React from 'react';
import { useRouter } from 'next/router';


const LangSwitcher = () => {
    const router = useRouter();

    const changeLocale = (locale: any) => {
        router.push(router.pathname, router.asPath, { locale });
    };

    return (
        <div className='flex gap-5'>
            <button onClick={() => changeLocale('en')}>English</button>
            <button onClick={() => changeLocale('he')}>Hebrew</button>

        </div>
    );
};

export default LangSwitcher;
This is the full project preview, and you can access the complete code on my GitHub repository.
https://github.com/Bawanthathilan/i18next-nextjs-demo

Summary
In this article, we covered how to use i18next to provide multilingual support to a Next.js website. Additionally, we added RTL support.